Online shopping has made it super-convenient for online shoppers to hunt around for the best prices.
With this in mind, customers are perhaps more sensitive to prices than at any other point in history. After all, why would you pay $500 for a product when the exact same model is available for $100 less?
You don’t even have to traipse across town, either; you’re just a few mouse clicks away from the cheaper price. It’s a no-brainer, right?
This has turned online customers into a group of serial bargain hunters.
Today I want to help ensure that your eCommerce store appeals to online customers’ hunger for a bargain. Let me show you exactly how to run a pricing promotion using coupon codes with WooCommerce.
CREATING A COUPON CODE WITH WOOCOMMERCE
If you’re brand new to WooCommerce, you’ll need to install the WooCommerce plugin first, then add a few products to your store before creating a coupon code.
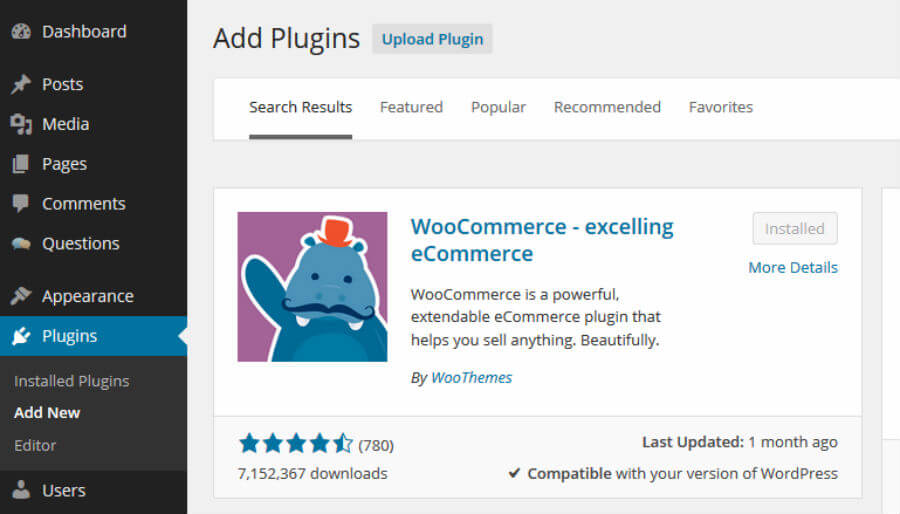
That’s a tutorial for another day, though, as I want to focus this tutorial specifically on how to set up a coupon code with WooCommerce. With this in mind, I’m going to go ahead and assume you’ve already got a WooCommerce-powered shop up and running.
To create a coupon, simply click WooCommerce > Coupons from within the WordPress dashboard. Go ahead and create your first coupon by selecting Add Coupon.
Start by creating the code for your coupon at the top — this is the code customers will apply at the checkout to get their discount. It’s also worth adding a brief description below to help you remember what the coupon is for.
The coupon page has three tabs on the left-hand side: General, Usage Restriction, and Usage Limits.
GENERAL COUPON TAB
Let’s start with the first tab, General.
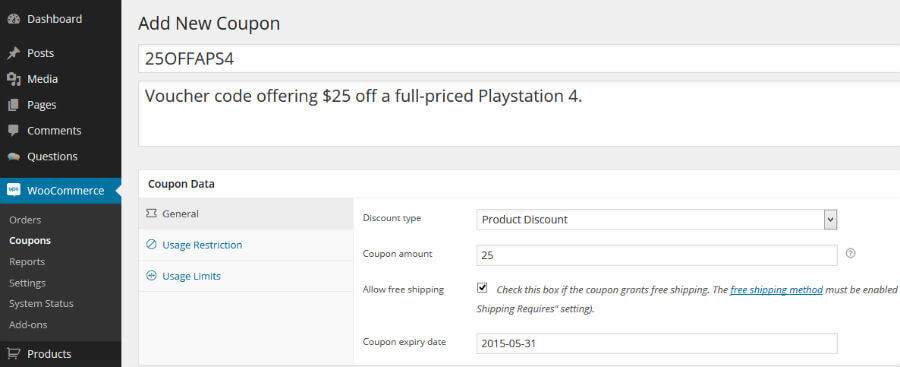
The General tab lets you specify what type of discount you’re offering. The out-the-box version of WooCommerce supports four discount types:
- Cart Discount — a fixed discount on your whole cart
- Cart % Discount — a percentage discount on your whole cart
- Product Discount — a fixed discount on a specific product/s
- Product % Discount — a percentage discount on a specific product/s
For this tutorial, I’m going to be offering a fixed discount on a specific product — a PlayStation 4 — so I’ve selected the Product Discount option.
Below, you must specify the Coupon amount.
If you’ve picked one of the % options, the number used here will determine the % discount. If you picked a fixed discount, it will determine the amount off in dollar-terms — or your store’s default currency.
I’ve gone ahead and added ‘25′ in this field, which means I’m offering a $25 discount on the regular price.
Further down, you can offer free shipping with a valid code, simply by checking the Allow free shipping checkbox.
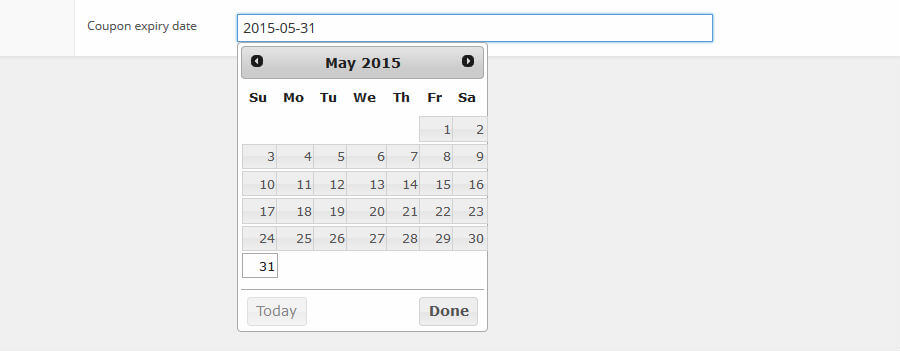
At the bottom, you can set an expiry date for your coupon, which is useful when running timely promotions — Black Friday, anyone? The expiry date is selected from a drop-down calendar.
USAGE RESTRICTIONS TAB
OK, with the General settings configured, let’s move onto the Usage Restrictions tab.
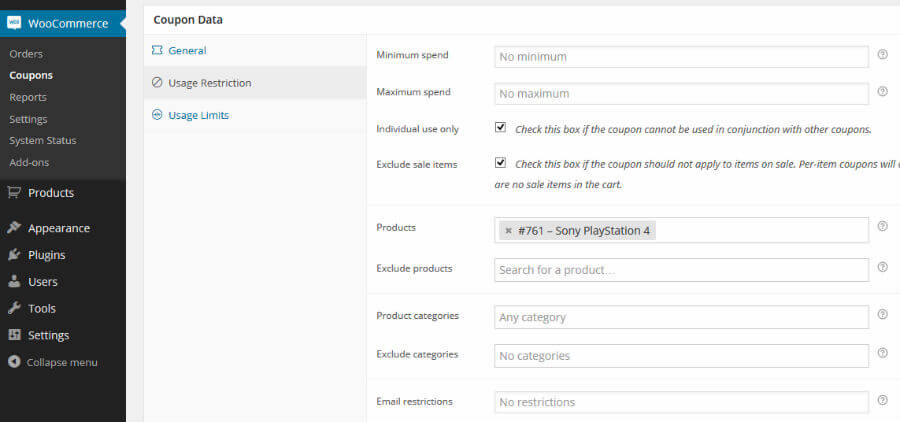
This is the tab where you’ll configure your coupon’s specific requirements — in other words, how it’s activated.
For example, you can set which minimum/maximum subtotals the coupon is valid between — great for ‘10% off orders over $100’ promotions.
You can also check the checkboxes to restrict one coupon code per order and prevent the coupon being applied to sale items — both recommended.
You can configure the code to apply to/exclude specific products and categories, too. This first option is relevant for the coupon I’m configuring, which is a $25 discount on a PlayStation 4. Obviously, I want a PlayStation 4 in my customer’s cart, otherwise, the coupon should be invalid.
Fortunately, WooCommerce helps you find your products easily: You can either input the first three letters of your product name or the product ID.
Setting Usage Restrictions is really straightforward, and WooCommerce includes a helpful tooltip for more information about each field.
USAGE LIMITS TAB
The final tab is labelled Usage Limits.

This tab lets you restrict how many times your coupon can be used — either per customer, or total uses.
I want to restrict my coupon to the first 1,000 users — great for creating a sense of urgency — and limit it to one use per customer, and one PS4 per cart.
With this tab configured, my coupon will expire either after my Usage limit or the specified Expiry date — whichever comes first.
That’s all there is to it, so when you’re happy hit Publish.
FINAL THOUGHTS
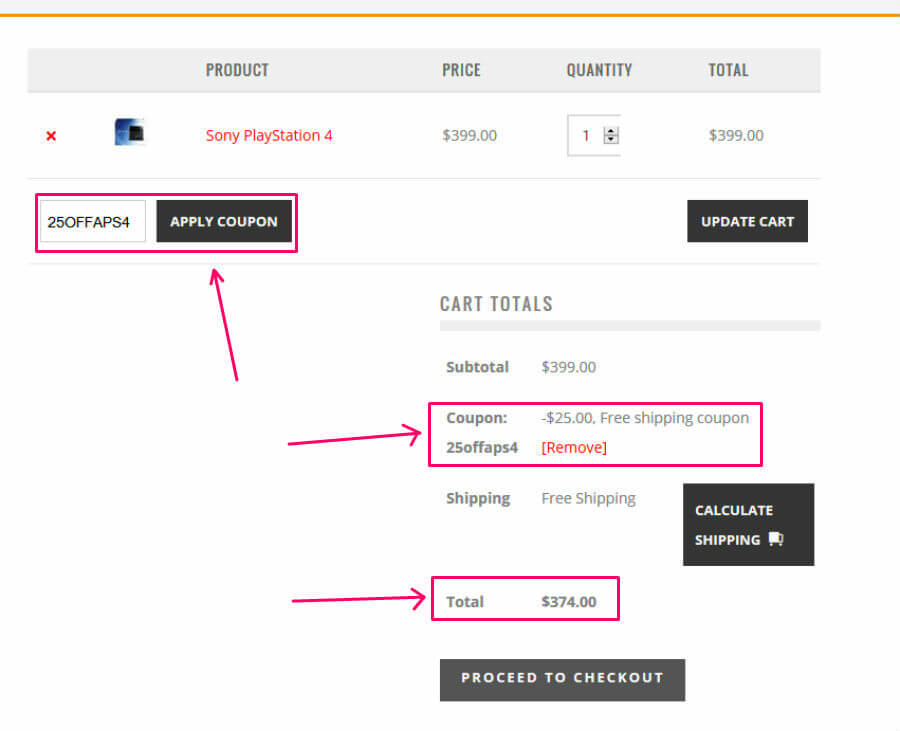
Now when a customer uses my coupon code they will save $25 off the price of a PlayStation 4.
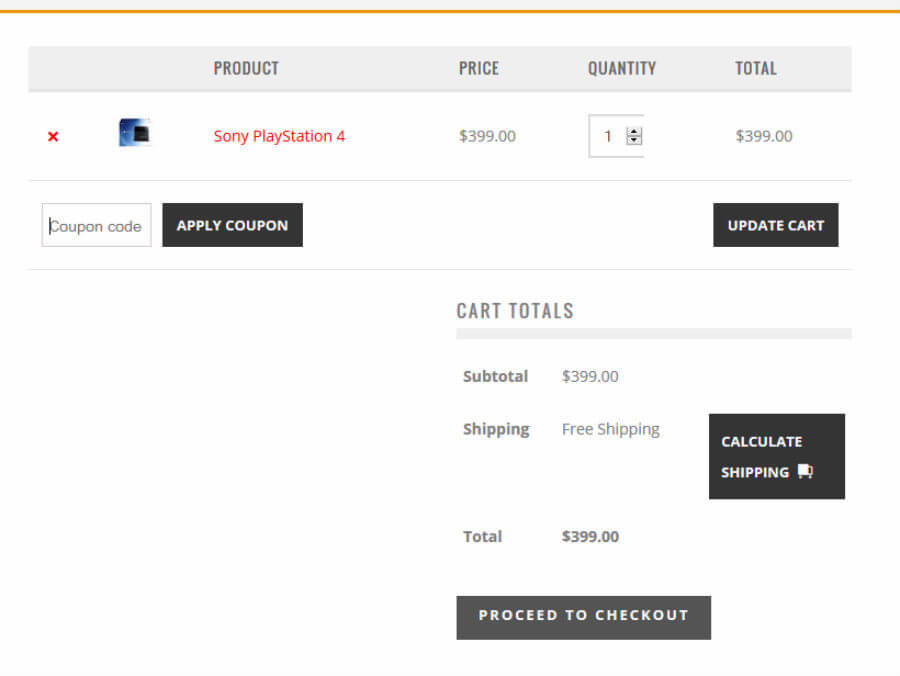
Here’s my checkout page before the coupon is applied:
And here it is after the coupon is applied, with $25 subtracted from the subtotal and free shipping applied.
Awesome, right?
As you’ve seen, WooCommerce makes it really easy to create coupons for your eCommerce store, making your prices more attractive to potential buyers. With your coupon created, it’s time to get out there and tell the world about your promotion, to help drive more sales for your online store.
The current version of WooCommerce supports relatively basic coupon codes; if you want more advanced coupons, I highly recommending extending WooCommerce with the WooCommerce Dynamic Pricing and Discounts plugin, available for $20 from CodeCanyon.
Looking for reliable WooCommerce hosting? Click Here
